Create an Aapli Account
To create a website through the Aapli platform, first a user needs to register the website domain of their choice. Go to registration-dev.aapli.app, where you’ll be met with this screen:
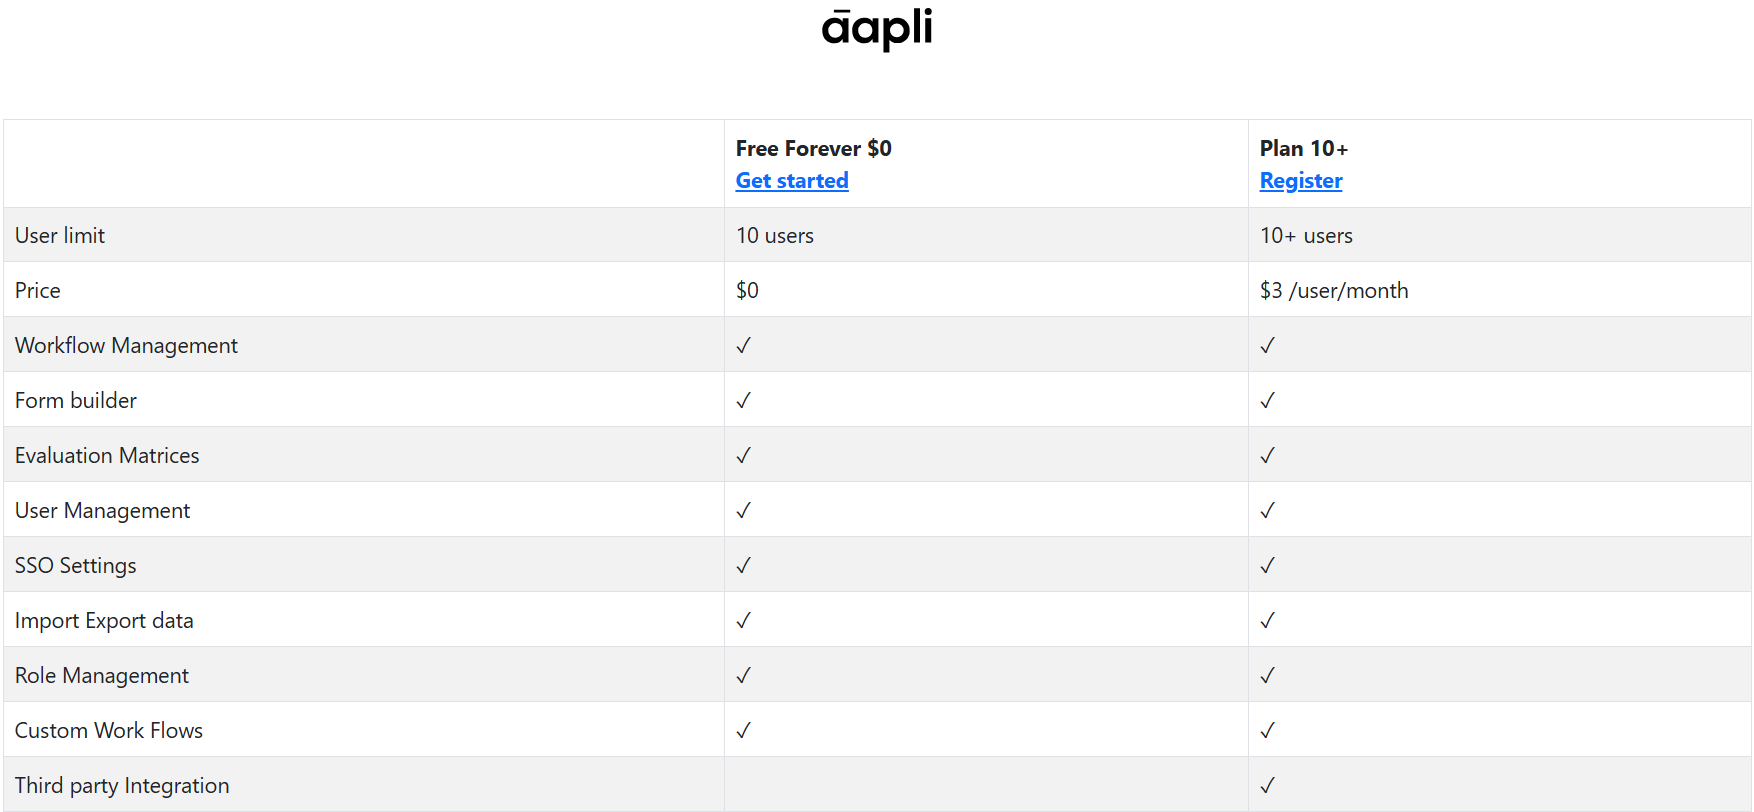
This screen shows two available plans and a number of available features to users who decide to sign up to the Aapli platform:
Plans
- Free Forever $0: The free plan for smaller suborganisations
- Plan 10+: A paid plan for larger suborganisations
Features
- User Limit: The maximum number of users allowed in the created suborganisation
- Free - 10 users maximum
- Plan 10+ - at least 10 users
- Price: How much creating the suborganisation will cost
- Free - no price
- Plan 10+ - $3 per user per month
- Workflow Management: The ability to create and manage workflow diagrams for applications
- Form Builder: The ability to create forms for user input
- Evaluation Matrices: The ability to create a summarised matrix, that produces a fixed result based on the outcomes of multiple fixed criteria
- User Management: The ability to add and modify user profiles on the suborganisation
- SSO Settings: The ability to adjust Single Sign-On access for users in the organisation
- Import/Export Data: The ability to transfer data in and out of the applications created within the suborganisation
- Role Management: The ability to create & modify, and assign roles to users in the suborganisation
- Custom Workflows: The ability to create more expansive & detailed workflows than the defaults presented during application creation
- Third-Party Integration: The ability to bring in third-party applications to work with entities created in the suborganisation
- Only available to users in the Plan 10+ plan
After selecting the plan of your choice, you’ll be led to this registration screen:
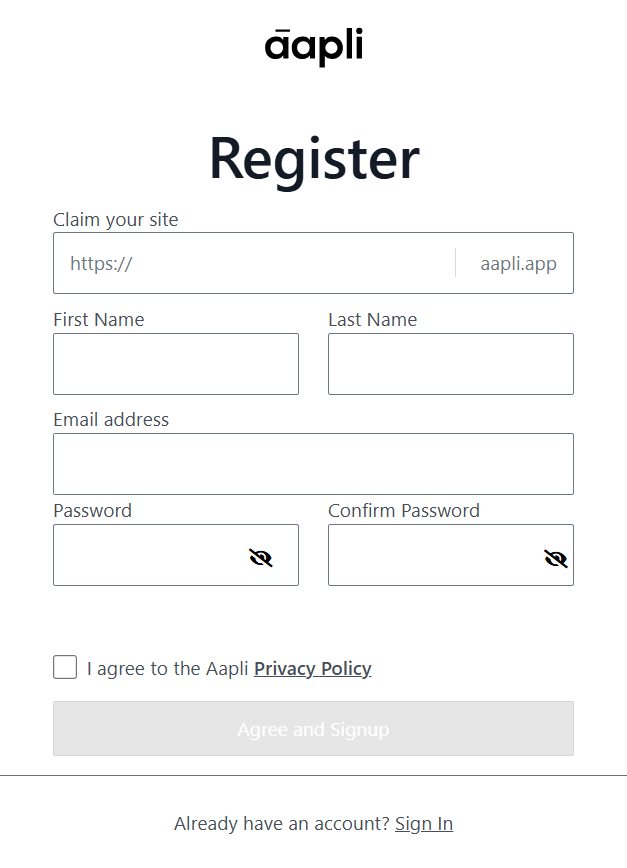
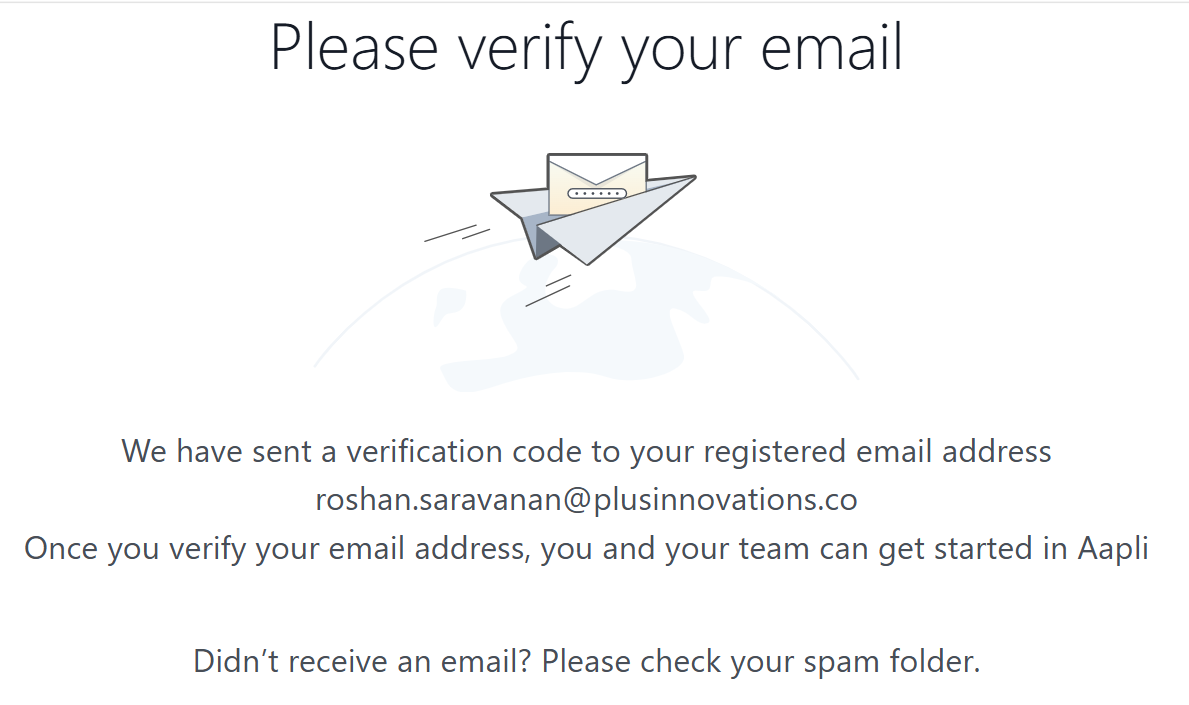
Once the necessary details are filled in, and you’ve affirmed your agreement with Aapli’s Privacy Policy, you can click the “Agree and Signup” button to register your suborganisation. You will then be sent an e-mail to the address you signed up with:
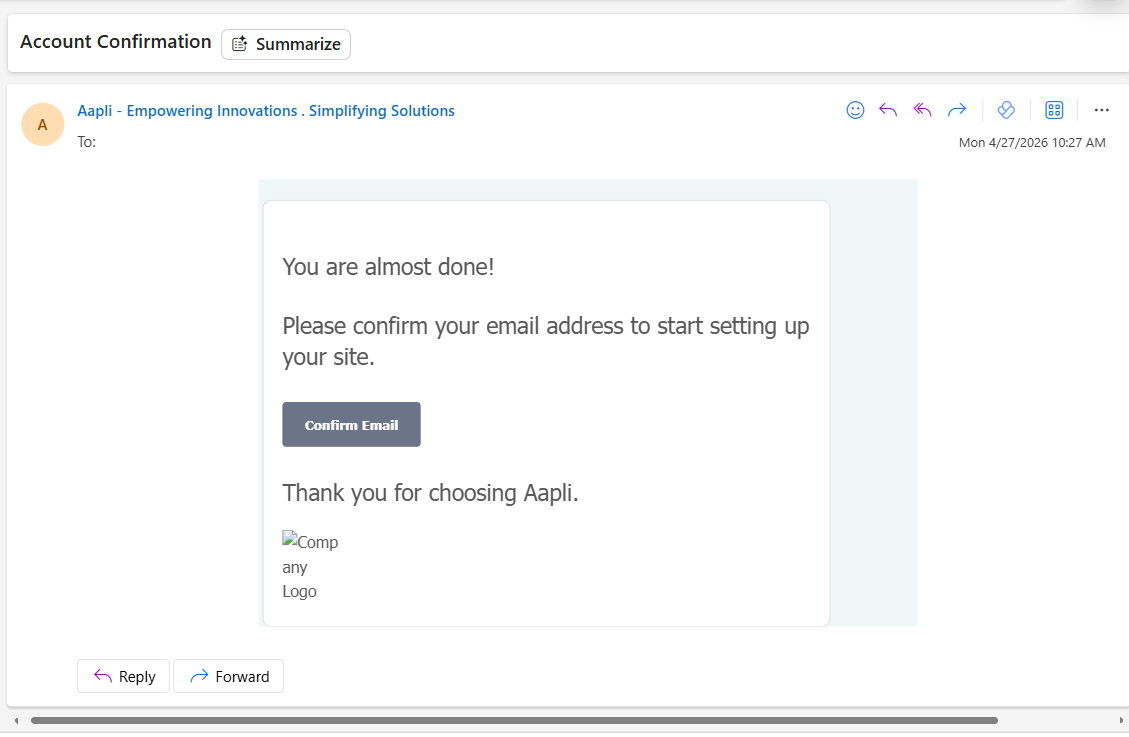
Click on the “Confirm Email” button to complete the creation of your suborganisation:

Now, your suborganisation will officially be created, and you can log into the admin portal using the details you assigned.
From here, you’ll be given the option to set some defaults for your suborganisation’s website. Click on “Let’s Start” to begin the configuration.
Start-Up Configuration
The first page will take you through your company’s most basic identifying details, along with a potential visual template for the website:
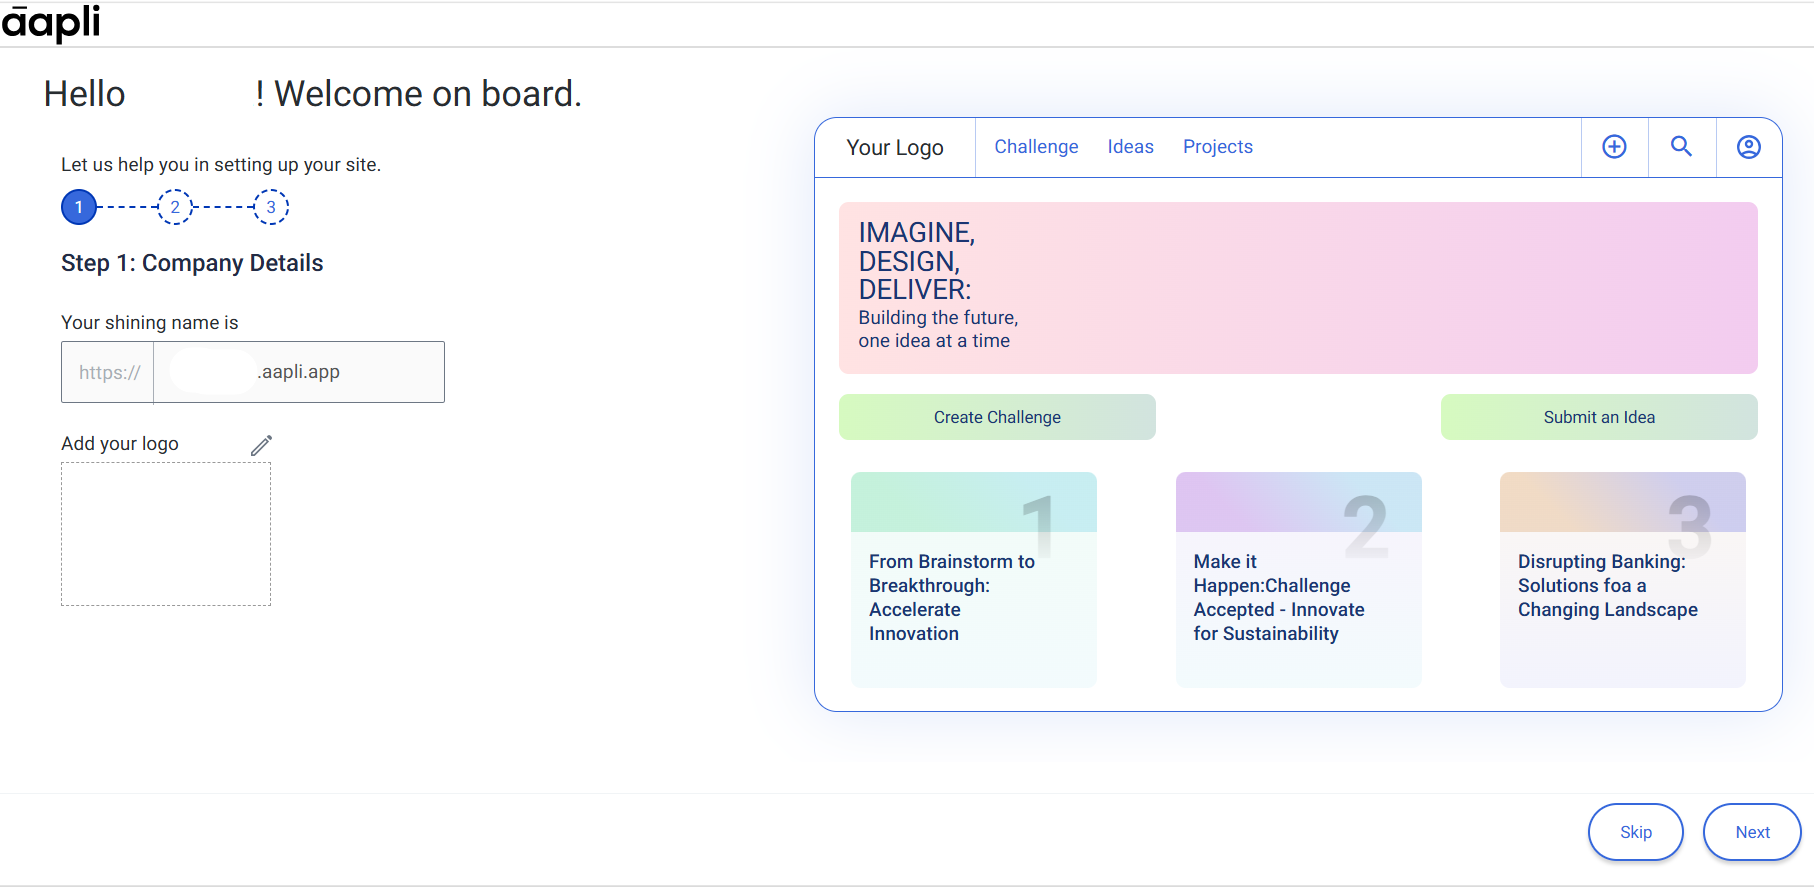
- Domain: The website name you agreed on at the registration step
- Logo: A panel on which you can import a customised logo for your website.
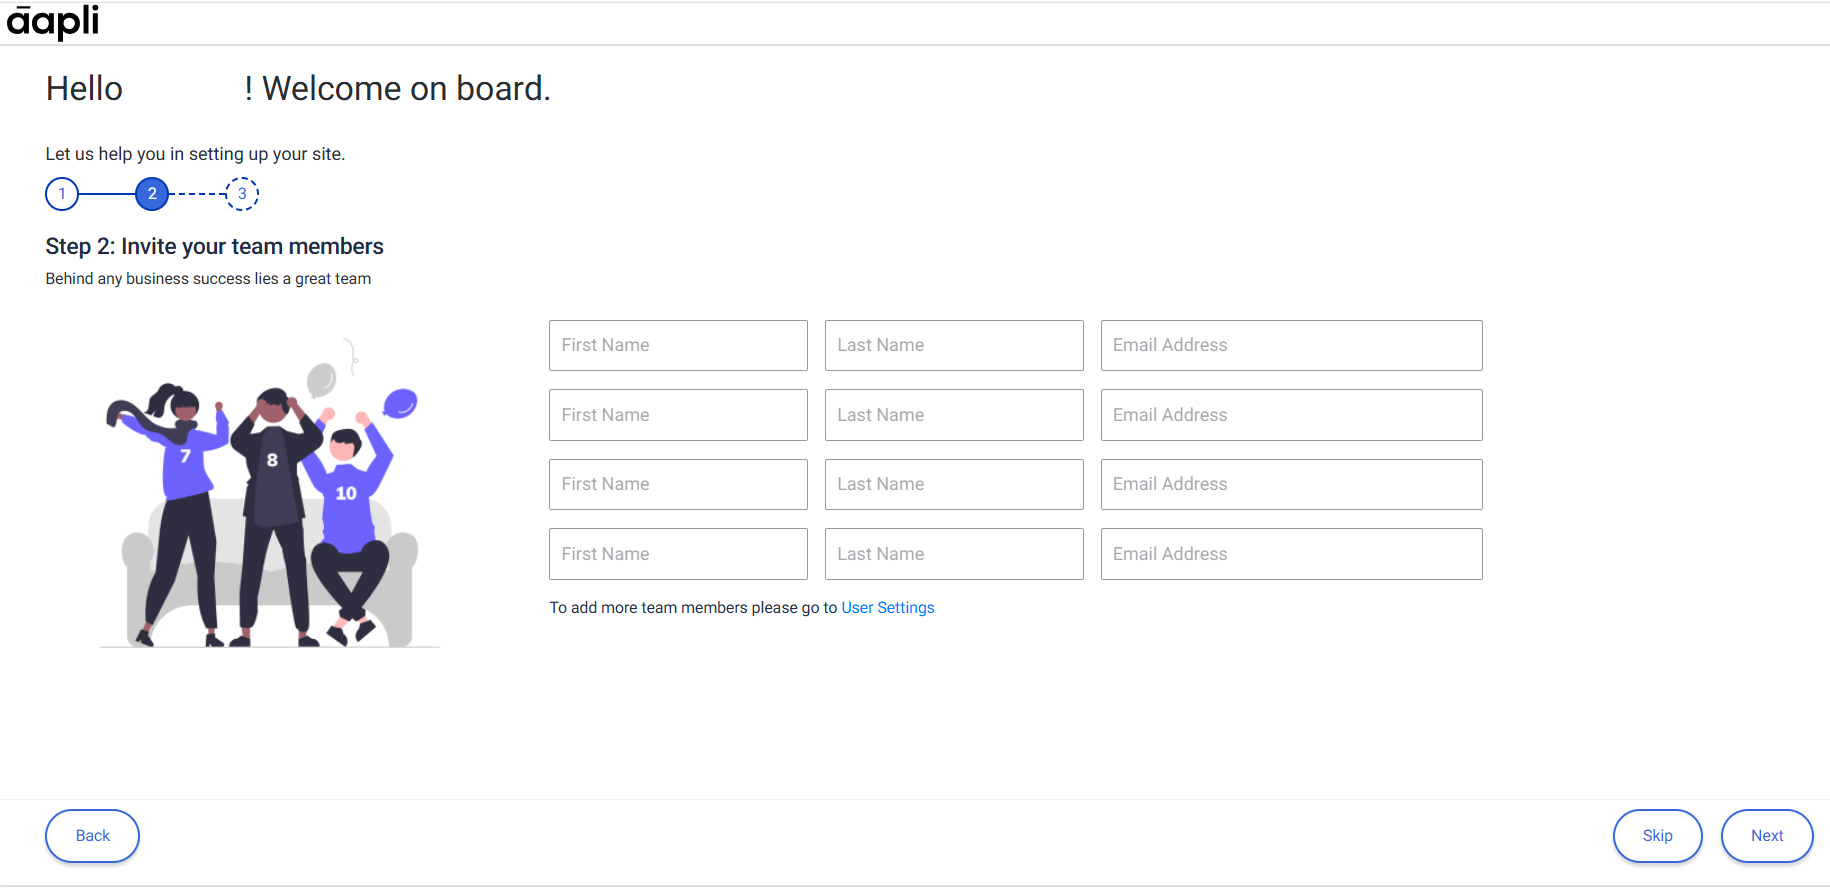
The second page will ask to create profiles for users you wish to add to your organisation from the start. If you wish to add more users, you can click on the User Settings hyperlink, to head straight to the User Settings page on the admin portal:
The third & last page for default configuration introduces you to a set of small tutorial videos, which will help you to familiarise yourself with the inner details of the admin portal website.
At any stage during this process, if you feel like you don’t need to configure default settings right now, you can click on the “Skip” button next to the continuing button, to be led straight to your admin portal:

Once you’re done with the default configuration, click on “Let’s Start” on the new page to be taken directly to the admin portal:

Congratulations! You have now created your first Aapli suborganisation website!