Application Settings:
The Application Settings tab is like the control center the application. It’s where admin provide important information to customize how the application would appear and works as per the needs.
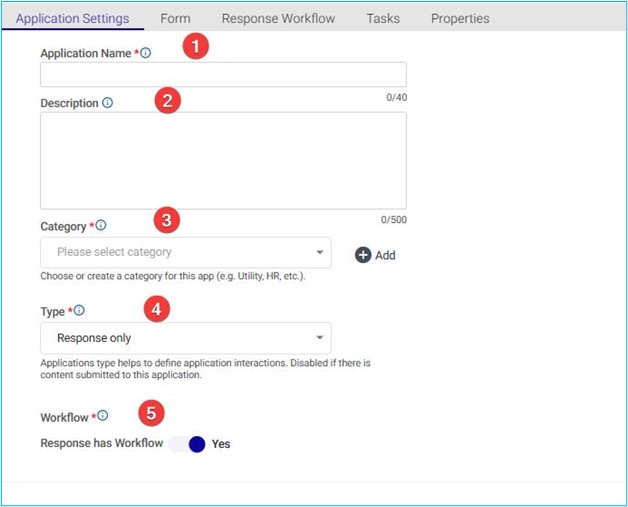
- Application Name: Give your application a name that shows what it’s about. This name helps people identify your app easily.
- Description: Write a short explanation of what your app does. This helps users understand the app’s purpose.
- Category: Choose a category that fits your app’s focus, like HR, Production, or Sales. This helps users find your app quickly.
Type: Type decides how users will interact with your application.
a. Response Only: If you just want to collect answers or feedback from users. b. Request and Response: If users need to ask for something and then respond to it, like placing a request and then giving feedback.
- Workflow: Workflow is a roadmap for how things flow in your app, this usually defines the approval process applied to the submitted content.
Below the workflow, we have a radio button to select whether the response has a workflow or not.
Note: As we select the workflows by selecting the respective radio button, we can notice that the Response Workflow and Request workflow tab being added along with Tasks tab.
Preview:
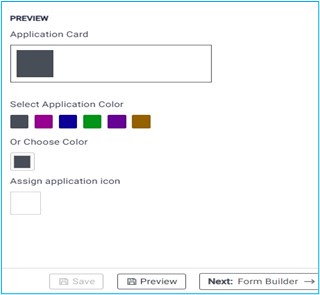
On the right-hand side of the Application Settings window, under the “Preview” pane, you can customize the color of the application card by clicking on the colored square below “Select Application color.” Choose an appropriate color for the application. Additionally, you can select a desired icon by clicking on the white box below “Assign application icon.” Choose an appropriate icon that represents the application’s purpose.
Once the configuration is completed click on “Next: Form builder” option on bottom right corner of the page.