Add SSO Settings
To create a new SSO Settings, follow these steps:
Navigate to the SSO Settings User Panel on the user interface.
Look for the “+ Add” icon, typically located within the SSO Settings User Panel. Clicking on this icon will initiate the SSO Setting creation process.
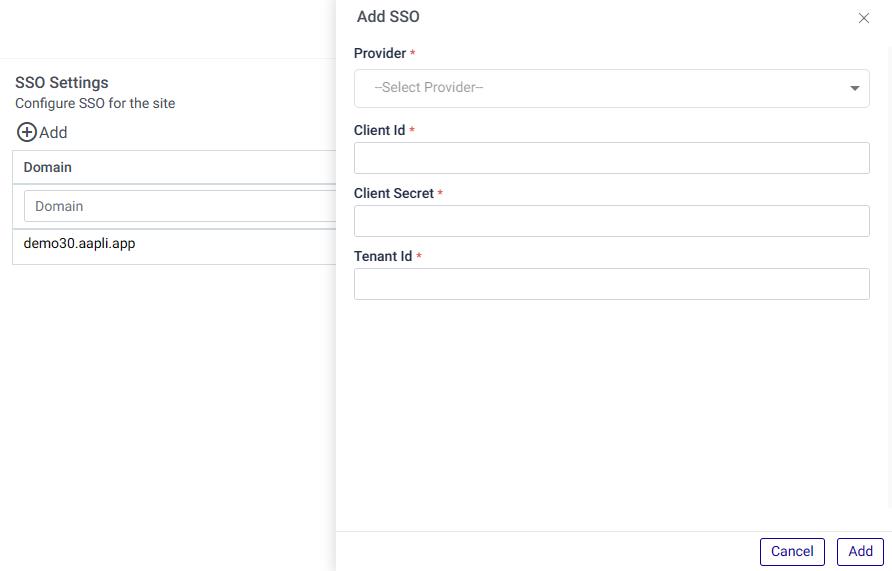
Once you click on the “+ Add” icon, a pop-up window will appear on the right-hand side of the page. This window will prompt you to provide the necessary details for the new SSO Setting.
In the pop-up window, the admin will be asked to select the SSO providing company. You can choose either “Azure” or “Onpremise AD” as the SSO provider, depending on your requirements.
5.The admin will also need to provide the following mandatory information, which will be provided by the selected SSO providing company:
a. Client Id: This is a unique identifier assigned by the SSO provider to authenticate the application or service with their system.
b. Client Secret: It is a confidential key used by the application to prove its identity when communicating with the SSO provider.
c. Tenant Id: This is the unique identifier for the tenant (organization) associated with the SSO provider.
Finally, click on the “Add” button within the pop-up window to create the new SSO Setting.